Securing Keycloak
Caution - change password
For security reasons, SEAL Systems strongly recommends changing the password of the preconfigured Keycloak user and configuring the TLS encryption. This way you can also avoid certificate warnings in the browser.
Changing the admin Password
After finishing the standard installation, the preconfigured administrator user is available:
-
User name:
admin -
Password:
SealAdmin1
Change the password of this user as follows:
-
In your Web browser, open the Keycloak user interface: https://localhost:32769
-
Open the
Administration Console -
Log on with the preconfigured
adminuser andSealAdmin1password. -
In
Manage Account, in theAdminmenu in the right upper corner change the password and memorize the new one.
Securing Clients
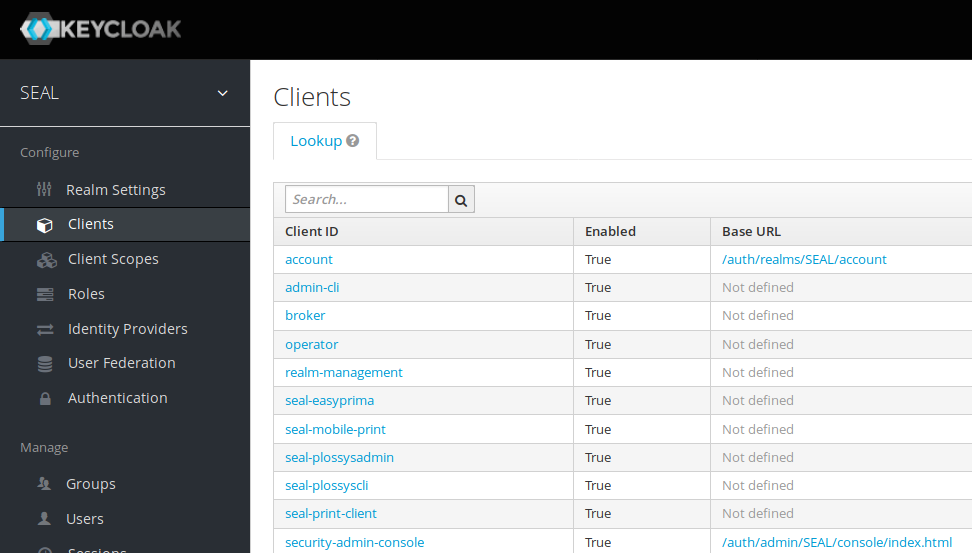
After fnishing the standard installation any predefined clients already have predefined secrets. For security reasons change the secrets for all clients and configure them on the client side.
-
In your Web browser, open the Keycloak user interface: https://localhost:32769
-
Open the
Administration Console. -
In the
Configuremenu on the left, selectClientsto open the client list.
-
In the
Client IDcolumn, select the following clients, one by one:seal-easyprimaseal-mobile-printseal-opcliseal-plossysadminseal-plossyscliseal-print-client
-
In each configuration dialog select the
Credentialstab and click onRegenerate Secretto create a new secret.Regenerating secrets using PLOSSYS Administrator as example:

-
For details on how to configure the new secret for the associated client, see the corresponding client documentation:
- easyPRIMA
- SEAL DocPrint (
seal-mobile-print) - SEAL OP-CLI
- PLOSSYS Administrator
- PLOSSYS CLI
- SEAL Print Client
Configuring the TLS Encryption
-
Get a certificate as Java keystore, see requirements.
Literature
For details on how to create a keystore and convert credentials, see Convert Certificates.
-
Copy the Java keystore into the JBoss configuration directory:
C:\ProgramData\SEAL Systems\data\seal-keycloak\configuration -
In the
security-realmssection ofC:ProgramData\SEAL Systems\data\seal-keycloak\configuration\standalone.xml, insert the following lines:<security-realm name="SslRealm"> <server-identities> <ssl> <keystore path="<yourdomain.com.jks>" relative-to="jboss.server.config.dir" keystore-password="<keystore_password>"/> </ssl> </server-identities> </security-realm> -
In
C:\ProgramData\SEAL Systems\data\seal-keycloak\configuration\standalone.xml, replace the existinghttps-listenerline by the following line:<https-listener name="default-ssl" socket-binding="https" security-realm="SslRealm"/> -
Restart the
seal-keycloakservice.